Friday, May 30, 2014

Mini Popcorn Earrings for Kate

Sometimes folks suggest design ideas to me. This was one of those times. Kate said it would be fun to have teensy popcorn earrings. It was a great idea. Here's how things turned out.


Two earring stud findings with backs
I used a clay roller
a pointy dental tool but a toothpick will do in a pinch
a soft paintbrush to apply the chalk
some sort of jewellery glue I used E6000

Monday, May 26, 2014

Pretty Pink Beads

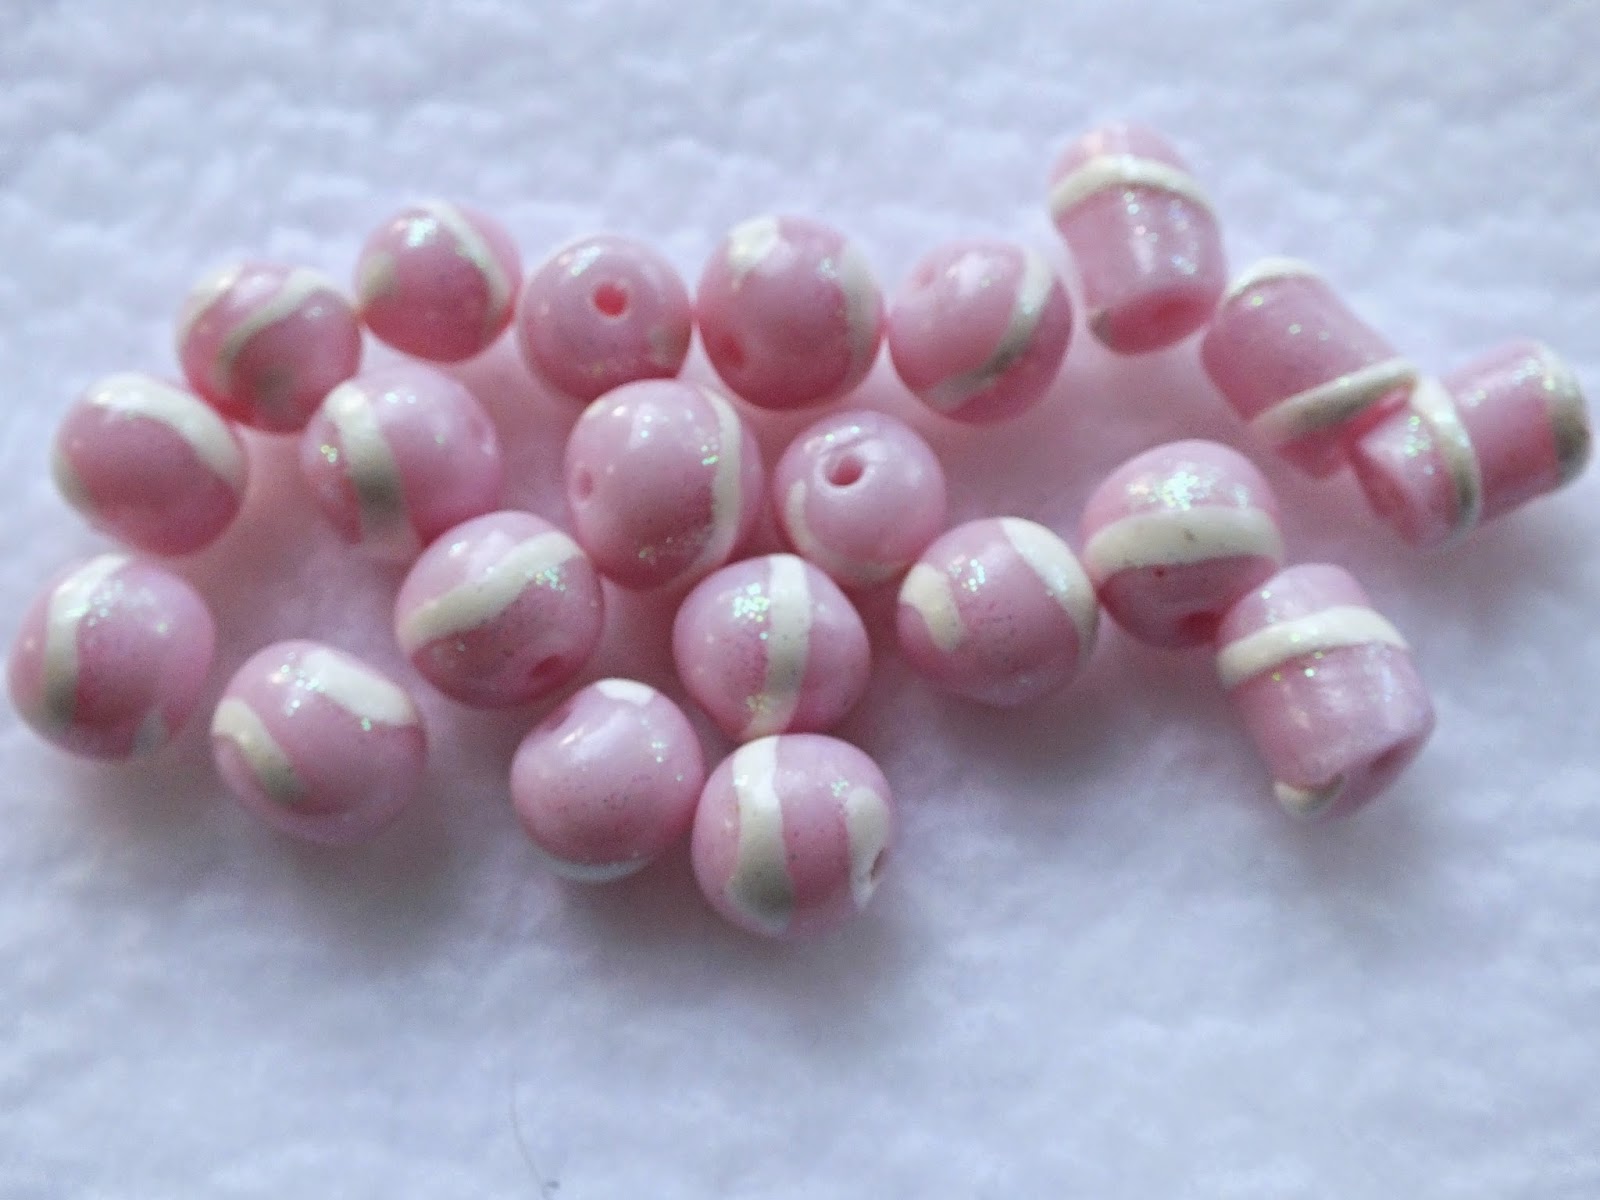
Made some pretty pink beads this weekend.

 I also spilled a wee dram of my evening cocktail into my old friend Lappy (aka my laptop). I learned that Lappy doesn't know how to hold his liquor. He's in at the Dr.'s. Thank goodness for LOD Custom Computers & Consulting. May be time to put the old computer out to pasture after many years of loyal service. We'll see how things work out. Neil at LOD is a genius and a magician, so I'm keeping my fingers crossed for a happy reunion.

Although... (and don't tell Lappy!) A new toy wouldn't be horrible... Would it?
Cue the Lotto winnings...

Here are the pretty beads.

a heap of fine sparkles in iridescent and pink
Several round toothpicks
a paper plate


First I conditioned some of the rose quartz Fimo by kneading it in my hands until it was soft and pliable. I added some sparkles and kept mixing.


When I thought I had enough sparkle added to my clay I rolled it into a 3/4 cm thick worm. I wrapped a 1/8th cm thick worm of white Fimo soft around the pink worm and rolled slightly in more glitter to seal the two worms together.


I cut the worm into 1 cm long segments. Some of the segments were rolled into balls and others I left as cylinders. I poked a round toothpick through one side of the bead. When it was just barely poking through the other side I stopped pushing, removed the toothpick and poked it through the other side of the bead. The double poking helps keep the bead round. Sometimes poking through one way only, makes the bead look a bit tear shaped.

I poked holes in the bottom of a paper plate so the bead loaded toothpicks would stand up while baking. I poked all my toothpicks into the plate and baked the beads in a preheated 230 degree oven for twenty minutes. I allowed the beads to cool before finishing them.


I glazed the beads with three coats of Fimo gloss varnish and let the beads dry.


Wednesday, May 21, 2014

Batty Bathilda in Watercolour Crayon

I've been sketching up a heap of designs these past few weeks. I use my STAEDTLER Triplus fineliner markers and my Karat Aquarelle watercolour crayons the most when I'm trying to figure ideas out.


I thought you should meet Bathilda. She'll be hanging around in other forms very soon.
I'm still trying to figure out expressions and costuming before I commit to a 3D version of her and make her real.


I really am loving the process.
I think I might just be a huge kid and LOVE to colour.
Note that MOST of the colour is in the lines.


Sunday, May 18, 2014

More From The Kid's Garden

We are enjoying a spectacularly lazy long weekend. The kids have been in the garden all day long and are now cooking us supper. Thought I'd share just a few pics of what's been happening today and hope you're all enjoying a relaxing weekend too.


The peas are getting root bound in their little temporary pots on the dining room table. The kids transplanted them into the garden today so they could stretch their roots out.


Emmy made some fantastic little veggie markers from STAEDTLER Fimo soft. I love these little veggies. She's making some for her garden at home too. We'll use these for years and they'll always make us think of her. She just sculpted some of the veg we had planted and baked them with a skewer poked in. After they cooled we poked them in the garden where the seedlings live. 


I love these lawn hyacinths that poke their heads up through the first spring grass on our lawn. I hate that we always have to cut them back when it's time for the first trim. Mom picked heaps for the table. 


Here's one of Emmy's garden markers in the works. I hope the real veggies turn out half as well as these did.


And lastly a pic of a teensy lawn violet. 
So so sweet hiding in the tall grass by the fence.

Happy long weekend everyone!


Saturday, May 10, 2014

The Happiest of Mother's Days

Wishing you all a happy day!

Especially happy wishes for the one who taught me to be crafty.

Monday, May 5, 2014

Springing

Maggs has taken over the garden this year. She's done away with the pallet garden we've been using for the past few years and has dug up a new one complete with wooden edging. So much work.
It's very cheerful to see the little sprouts coming up. She's got them on the dining room table so we can have a peek at them every time we pass by to go into the kitchen.


She's made room in the old bed by splitting up the chives and potting some for kitchen use.
I love her hand painted pots.


A shot of one of her trays of sprouts. There are peas and peppers and tomatoes and melon, carrots and radish. 


I think my favorite so far are these teensy little sweet basil sprouts. They're unbelievably tiny right now. Can't wait until they all go into the ground. It's all very exciting. We're lucky to have such a prolific gardener. 

Thursday, May 1, 2014

Rainbow Cake Time

It was Maggie's 20th birthday this week and we celebrated in the usual style.


Rainbow Cake!!!
Here's a link to the original process post just in case you need to try this amazing cake.
The colours were amazing this time.


This is the outside of the cake. We try to make the icing as drab and un-colourful as possible. It makes the inside of the cake look even more amazing! We did add some opalescent edible sparkles to the surface of the cake just for some added pizzazz! 

Oh, we used the cooked, no icing sugar icing on this cake too. It's our favorite icing. Not too sweet.