
We're still working on our house retro-vations. We went to Fabricland and picked up some yardage for dining room and living room curtains and we wanted to add a splash of red. The first thing I thought of as inspiration was my Grandma Maggie and her red geraniums. She used to always have a pot wintering over on the kitchen window sill and this cheerful pest repelling bloom will always remind me of her.
I wanted to make my own design so I started with STAEDTLER fimo effect in red glitter. I wanted to reproduce the design quickly and easily so I picked up some Easy Mold from Above Ground Art Supply in Toronto.

I started by making a cabochon shaped blob of clay and laying some teardrop shaped petals in groups of five onto it. I created some texture by adding indents to each petal with a sculpting tool.

I kept adding overlapping flowers until the cabochon was full. I dotted the center of each flower with a poking tool.

Here is the finished piece. I baked it in a 230 degree preheated oven for 20 minutes and allowed it to cool completely before the next step.

I made a smaller piece too. I wasn't sure exactly how big I wanted the piece and I've never used this mold making product before so I wanted to have some choices later.

I pulled out equally sized blobs of each of the two mold making components. It was much softer than I anticipated and almost odorless.

I squished the two balls of product together just like I was mixing fimo colours together. The instructions said I had three minutes to mix but I didn't even need half that time to get a complete colour blend and start molding.
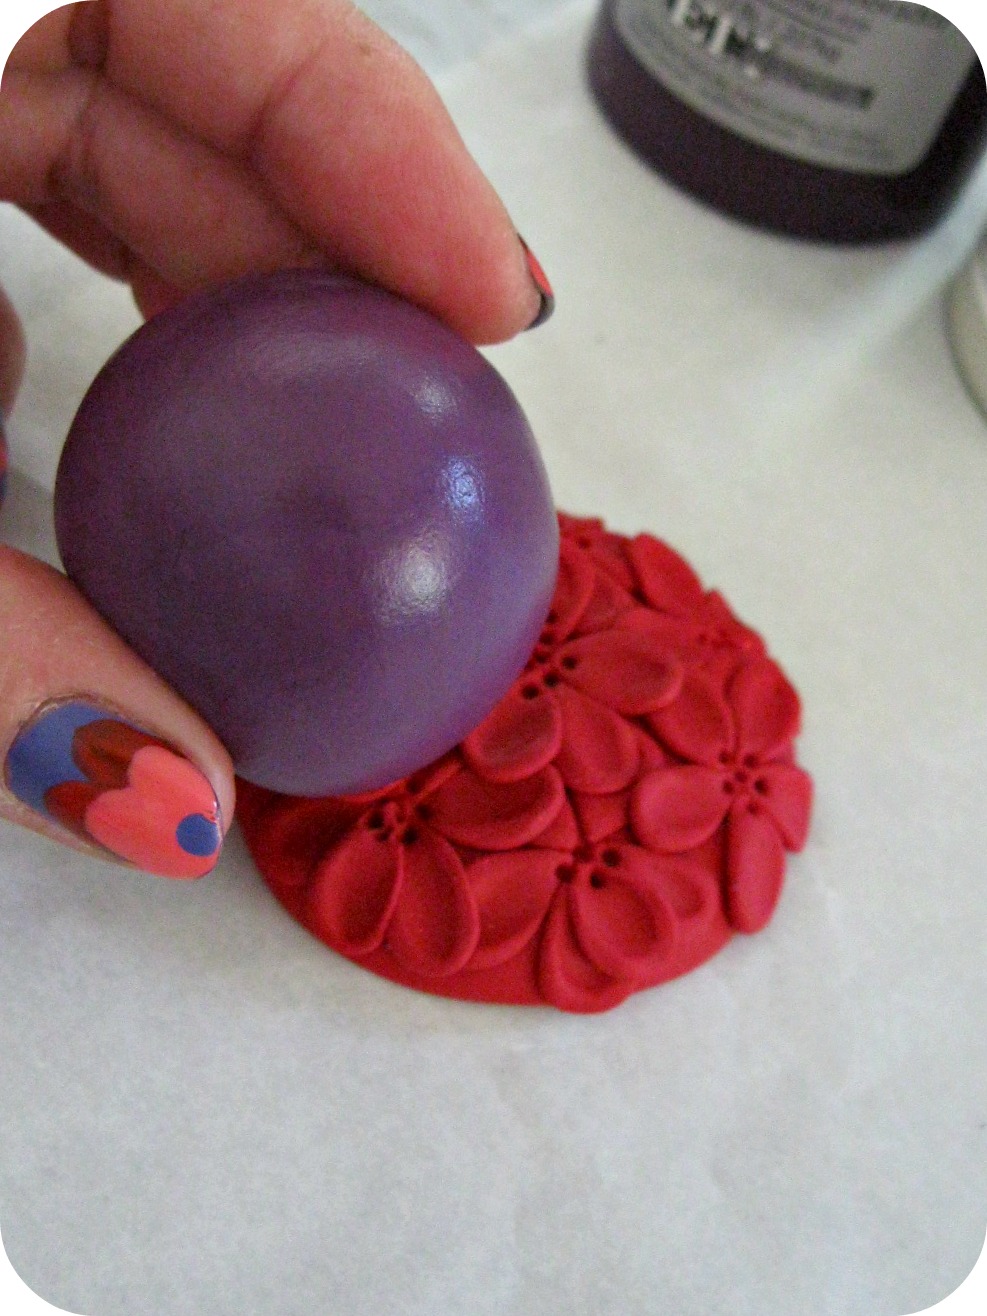
I made the mold medium into a smooth ball to avoid creases in the finished mold. My piece was thin so I opted to push the mold medium onto the piece instead of the piece into the mold medium. I started by placing the blob of easy mold on top of the piece and pressing firmly and evenly until the piece was covered.

After the top of the piece was covered I pressed the easy mold down into the sides of the piece. I made sure to push the medium into all the creases and dents of the baked fimo piece.

I let the curing mold sit with the piece in it for 30 minutes. The instructions said it only needed a 25 minute cure time but I wanted to be sure it was cured before I touched it. I un-molded the original and had a look inside. I have to admit, so far this has been REALLY easy! I think I'm going to be using this product for all kinds of future projects.

I started to make castings right away! I softened more STAEDTLER fimo effect in a couple of colours. I made little balls of clay and smooched it into the molds. The molds remain flexible so I could flex the molds to get the unbaked soft clay out easily without distorting the design. The instructions on the easy mold tell me that I can bake the clay right in the mold up to a temp of 400 degrees. That means I can create designs with even more detail and not worry at all about distorting the designs in the un-molding process. I can cure the duplicates right in the mold and flex the mold to release them after they've hardened.
Have you guys tried this cool product yet?